Precision in Every Instrument — Excellence in Every Field
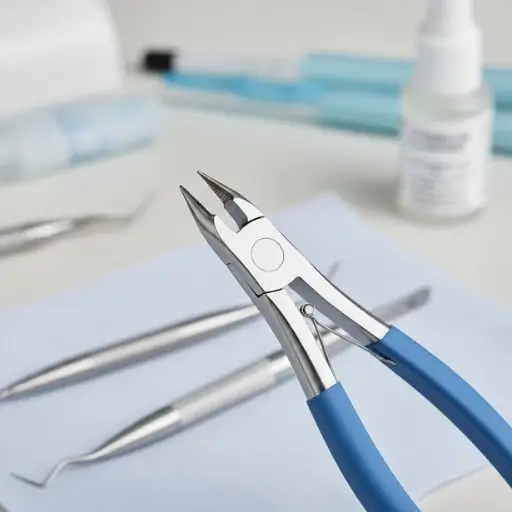
In orthodontics, your instruments are an extension of your hands. The right pair of pliers doesn’t just make the job easier—it ensures clinical precision and keeps your patients comfortable. Whether you are bending archwires or removing brackets, the quality of your tools directly dictates the efficiency of your practice.
This guide covers the essential types of pliers every clinician needs and the best practices for keeping them in top shape.
It’s tempting to save on costs, but cheap instruments often lead to hand fatigue, rusted joints, and dull edges within months. Here is what to look for:
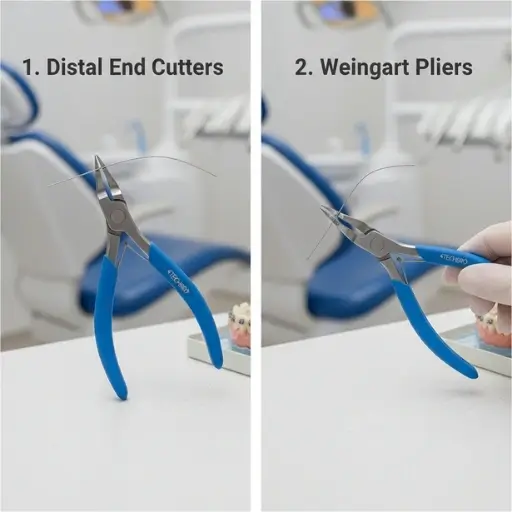
This is your most-used safety tool. It is designed to snip the archwire and—more importantly—hold onto the loose end. This prevents the wire from falling into the patient’s mouth or injuring soft tissue.
Must-have feature: A reliable “safety hold” mechanism that catches the wire every single time.
The “all-rounder” of the kit. With their tapered, serrated tips, Weingart pliers are perfect for reaching into the posterior regions. They are the go-to tool for placing, removing, and guiding archwires into buccal tubes.
These are built for precision. They feature fine, sharp tips meant for cutting soft stainless steel ligatures or elastics.
The Golden Rule: Never use these on heavy archwires. Doing so will immediately chip the delicate blades, ruining the tool.
The classic tool for wire bending. With one conical (round) jaw and one pyramidal (square) jaw, you can create various loops, springs, and smooth curves in both round and rectangular wires.
At the end of treatment, you want a tool that “peels” the bracket off. These pliers apply pressure to the bracket base or wings, allowing it to pop off without applying harmful torque to the tooth enamel.
Even the best pliers will fail if they aren’t cared for. To get the best ROI, follow these three rules:
Mastery in orthodontics isn’t just about clinical knowledge; it’s about the synergy between the clinician and their instruments. High-quality pliers and cutters represent a long-term investment in your practice’s reputation and your own physical health. By selecting premium materials like tungsten carbide and adhering to a strict maintenance protocol, you ensure that every wire bend and bracket placement is executed with the precision your patients deserve. Ultimately, great tools don’t just last longer—they make you a better, more efficient orthodontist
No. Ligature cutters are designed for soft wires only. Using them on hard archwires (like NiTi) will dent the blades instantly. Use a dedicated Hard Wire Cutter or Distal End Cutter for that.
This usually happens because the lubricant has been stripped away by the heat or because debris is stuck in the hinge. Apply a drop of instrument lubricant and work the pliers open and closed a few times to loosen them up.
In a busy practice, cutters usually need professional sharpening every 6 to 12 months. Sharp tools make cleaner cuts, which means less discomfort for your patients.
If the hinge has become loose (wobbly) or if the tungsten carbide insert has cracked, it’s time for a replacement. A loose hinge leads to "overlapping" blades, which results in poor cuts and can damage the wire.
Ensure your supplier provides instruments that are ISO certified and FDA or CE cleared. This guarantees the steel is medical-grade and the sterilization protocols are safe.
S.I.E Sialkot 51310 Pakistan
© 2025 4Tech Bro. Manufacturer & Exporter of Surgical Instruments. All rights reserved.